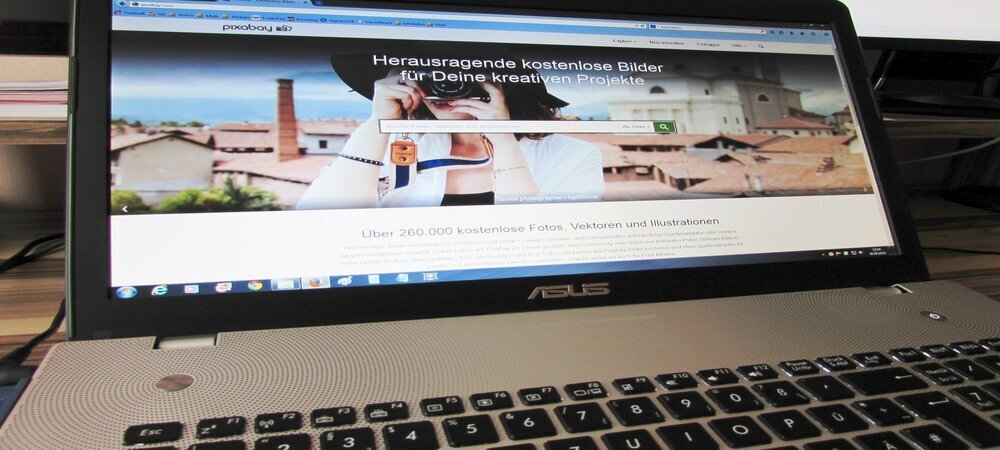
If you are an ASUS user looking for ways to screenshot notes or anything for that matter, you have come to the right post. In this article, we would list different courses to carry out the screenshot process in ASUS laptops.
Being a laptop user( regardless of the brand you use) comes with a fair amount of complexities, especially when you try to repeat the same thing that you would do on your phone, like taking screenshots. If you are confused about how to go about it, read through the ways we are about to put out in this article.
By using Control + Print Screen
The first way to take a screenshot or perform screenshotting on an ASUS laptop requires you to use two buttons.
You can take a screenshot by pushing the Ctrl (control) button located at the bottom left of your laptop keyboard, along with PrtSc (Print Screen), which you will find at the top right of the keyboard, just right next to the three indicators of Number lock, Caps lock and Scroll lock.
To save the screenshot, paste the same by pressing Ctrl + V and save it using Ctrl + S.
By using windows + Print screen
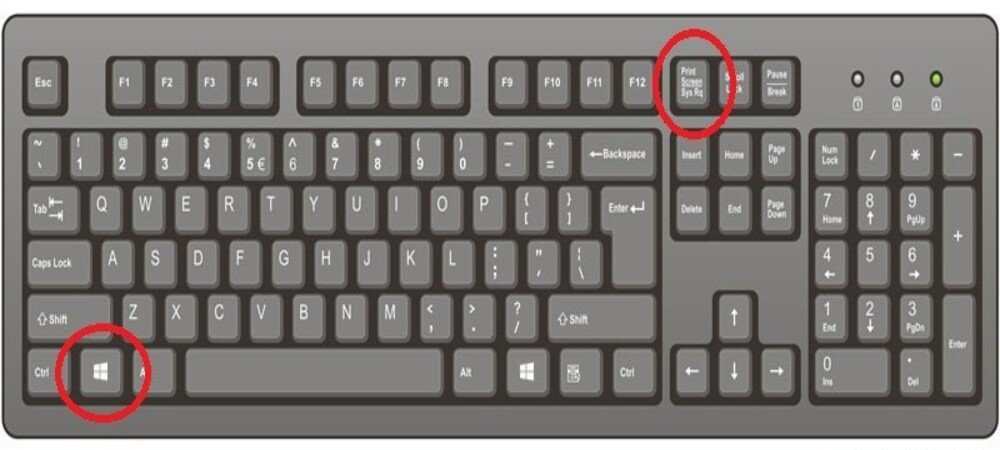
The following way needs you to use two buttons, namely windows and print screen (like we used before). Following is the way how it should be performed.
For this, you will have to press the windows button together with the Print Screen button. This way, you’d be assured that a screenshot has been saved to your system to access anytime.
Paste the screenshot on any place by pressing Ctrl + V and then save it afterward using Ctrl + S.
By using the visible mouse cursor
The next way to take a screenshot of essential things is a bit twisted, but we will help you through it.
- First off, tap the window button on your laptop keypad.
- Look for the app named Steps recorder. Save your time by typing it in the search box
- Click the app, and a short screen will appear before your eyes.
- Peep the option of the start record and press it.
- After this, you can take a screenshot just by clicking, wherever, on the screen.
- Once this is done, go ahead and stop the recording.
- You can view all the screenshots with the visible mouse cursor by clicking on save.
Paste the screenshot – Ctrl+ V
Save it- Ctrl + S.
By using ALT + print screen
This fourth option mandates you to click on the Alt option, next to the windows button, along with the print screen button (go over the earlier ways where we have mentioned where this key is located).
Just by pressing these buttons, you will have the screenshot downloaded to your phone.
Use the following to paste and save it
Ctrl + V (to paste)
Ctrl + S (to save)
By using FN + print screen
In this screenshot technique, you will have to run your fingers to the FN button next to the print screen button. Press both of these buttons together to take a screenshot. It is as simple as that.
You can also edit the screenshot as per your need by pasting it (Ctrl + V) on some photo editor app and saving it (Ctrl + S).
By using Lightshots
If you like to go for applications instead of these temporary and futile attempts to take screenshots of your notes, or anything, try light shots.
You can find the light shots on google play store or apple store. Also, this application is available to both Windows users as well as macOS users.
One of the main pros of this application is that once you are done taking the screenshot, you can also upload the same to the cloud and share the link with someone. Go ahead and download the app to take high-quality screenshots and tuck them away in some folder.
By using Snagit
The upcoming software on our list is Snagit. To acquaint you with this application, it’s a screenshot software that lets you effortlessly take a screenshot and customize it as per your preference.
One might confuse about the difference that separates this from the software mentioned above (light shot). It appeases the whole process of screenshotting through various editing options available within the app itself.
The process more or less remains the same.
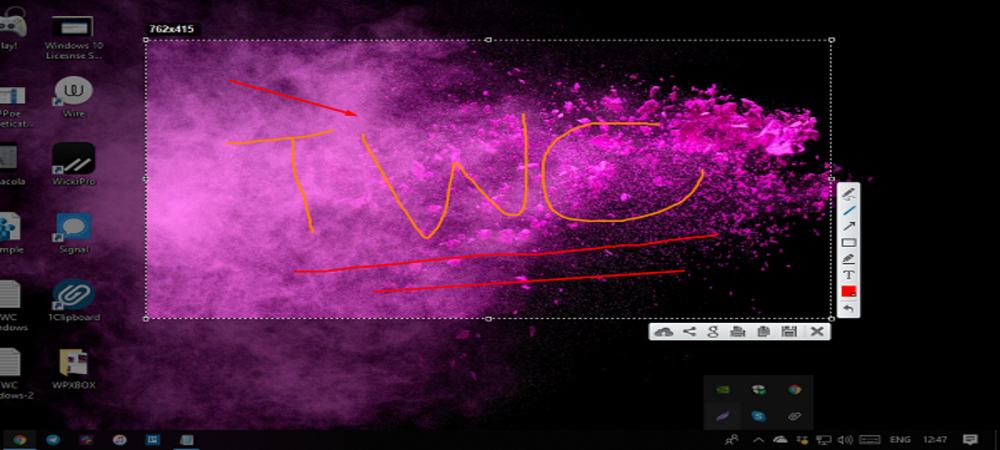
- Open the app after signing in
- Place the cursor on the intended area and drag the mouse around the area
- Click the camera icon to capture the space you have placed your cursor over
- Dash ahead with the various editing options available within the app to customize it as per the demand of your task
By Snipping tool
This next application/software has everyone smitten by its existence and why not. This screenshot tool’s name has been kicking around for many years, and understandably so. This app doesn’t ask for any downloads, i.e. it’s already there in your windows.
- Search the app Snipping tool in the search box until it appears
- As the site opens, you would be faced against a short window screen where there will be an option of New
- Repeat the process as you did with the Snagit screenshot tool
- Once you are done with taking a dupe, click the Save snip icon to save the screenshot.
By Window ScreenShot feature
In this technique, you do not need any external app to carry out screenshots and save them after that.
The headache is assayed by two clicks only.
To take a screenshot, follow the steps given below:
- Open the window that you’d like to save a dupe that is accessible even when you are offline.
- Press Windows + H keys together to take it
- Shortly after, a window will appear of Share from the ride side of your screen. Over here, there are various sharing options available on your laptop or PC. Click the most promising option as per you.
By using Extension/Plugin
This last one(that includes many) is exclusively for those people who need a screenshot tool or software to capture off of a chrome browser.
There are several screenshot extensions available that will take the screenshot for you in the browser. We will be naming down a few extensions so that it will be easier for you to decide on one:
Lightshot – Chrome users can access this extension by adding it to their browser.
Fireshot – This next extension, ‘Fireshot’, can also be added to your browser to help you with the screenshots.
Download these extensions available, and you are all ready to go.
FAQs
-
What is a PrintScreen button?
The PrintScreen button is there on all the Laptops and PCs available in the market. This button comes in handy when used with other controls, as we discussed above. It facilitates the screenshotting procedure and is located at the top right corner of your keypad, right next to the indicators.
-
How does a PrintScreen button work?
As we mentioned in the previous paragraph and earlier paragraph, it comes into play when taking screenshots. We have enumerated different ways to use the button and others to capture anything you would want to. Refer to the previous paragraph to know where it is located.
-
Where do my screenshots save?
Sometimes, your screenshots get lost, and you have no option but to retake them, which fills your storage with unwanted or duplicate pictures.
To avoid this, follow the steps given below:
- Look for the file explorer on your Asus laptop and open it
- You will see the option of the picture in the quick access section, go ahead and tap on it
- You will be faced with various folders; search for the screenshots.
Over here, all your screenshots will be saved/are saved.
-
How to take a long screenshot on ASUS Laptop?
To capture long screenshots on your ASUS laptop, all you have to do is follow the process we are about to lay down
- Go to your search box and type in the snipping tool
- Open the software and start taking the screenshot
With this app, you can take long screenshots as per your requirement. The fact that it is right at your disposal without you having to clutch at straws for different screenshot tools.
Conclusion
The article mentioned different ways to take a snapshot of whatever you like on the Asus laptop. From various external options available on the internet(precisely play store or apple store) to coming up with different ways to take a screenshot just by using one or more buttons.
We have also answered quite a few of your doubts related to the same, for which you have to scroll above. Flick through every point if you have ever struggled/struggle with taking screenshots on your ASUS laptop and follow the steps we have talked about at length. It is that easy.